Tuesday, November 2, 2021

Creamy Chicken Pie


 My husband has been begging me to make the chicken pie of his dreams- chicken and mushroom chunks in a white, creamy sauce. Well, i finally decided to blog it :D

The pastry on the bottom is my old and trusted shortcrust pastry from my  see in the dark chicken pie. The pastry on the top is shop bought puff pastry, as it looks prettier :D

For the filling i used two chicken breasts and 10 mushrooms cut into chunks, I added 2 onions and fried it all up , then added a basic bechamel sauce made with sunflower oil (5 tbs), flour (1/4 cup or 60 ml) and coconut milk (4 cups or 960ml) and a chicken stock cube. Let the filling cool.

Roll out the short crust pastry and place in the bottom of your pie tin-making sure there is enough to come up the sides, place the filling inside, and then cover with the puff pastry top. I then crimped the bottom layer over the top of top layer, to achieve a slight crust around the top of the pie.

Bake in the oven (200c) for 25 minutes or until the top is gloden brown. Serve with mashed potato and any veg you like.


ENJOY!

Thursday, November 5, 2015

Cheeky monkey banana bread

This banana bread recipe was given to me by a dear friend of mine. It worked for both our cheeky monkeys as it is vegan-he cheeky monkey is allergic to eggs, and mine to dairy, so this really appealed to me on many levels...add in the fact that it is delicious, and we have a winner :D
I am currently auditioning my old recipes as entries for the school bake sale at the Christmas fair, and this recipe literally fell into my lap. As i said above, this is a really fabulous recipe, but i wanted to put a little twist on it, so after scanning the internet, i decided to put a crumble topping on it. The outcome is divine! You can make it with or without, but as the recipe makes two loaves, may i suggest you make one with, and one without? :D
Without further ado, here is the banana bread recipe:
Take 3.5 cups of plain flour, 1 cup sugar, 1 tbsp+1 tsp of baking powder, 1 tsp baking soda and 0.5 tsp salt and mix together in a bowl. add 3 or 4 mashed bananas, 1/3 cup veg oil, and 1/4 cup soy/oat/coconut milk (i use Koko coconut milk). Mix well. You will end up with a very thick, chunky batter. Divide between two loaf tins and then (if you want) add the crumble topping...0.25 cup of plain flour, 0.25 cup of sugar and 0.25 cup of oats, cut in 2 tbsp until it resembles breadcrumbs. divide into 2 and spread over the top of the banana breads. Bake at 180C for 50 minutes...enjoy!


Sunday, October 25, 2015

See in the dark chicken pie

My children absolutely love chicken pie so over the last couple of weeks, i have been subtly altering the recipe so that i can include more goodness into them :)
First things first-the pie dough. Take 4 cups plain flour, add 1/2 cup vegetable oil, 1/2 teaspoon salt, 2 teaspoons baking powder, and 1 cups of water. Mix into a dough and put into the fridge to rest for half an hour.
Heat oven to  200C , and prepare the filling. Today i used leftover chicken from yesterdays roast chicken. Prepare paste -Place 1 can mushrooms, 1 carrot peeled, and 100g pumpkin into a blender until it comes together in a paste.


Dice one onion.

Peel and dice one potato.

Roll out pastry until it is very thin, and using a small plate as a guide, cut circles of pastry out.

Place one teaspoon of the veggie paste in the middle of the circle, then place a teaspoon of diced onion on top, cover the onion with a teaspoon of the diced potato,

and top that with small pieces of chicken (you can also use chicken mince).

 Paint around the filling with water, and then fold over the pastry and use a large mouth cup to cut and seal the pie. Brush the pie with egg and place onto your paper lined baking tray. Bake for 25 minutes or until golden brown.


Sunday, May 24, 2015

sweet tooth :)

I had an urge for something sweet, so i decided to whip up an old favourite :) This cupcake recipe was a staple of mine once upon a time, as george was unable to eat eggs or dairy. Now we are down to dairy but he is able to eat egg, so i have moved on to other recipes, but every once in a while i like to dust this recipe off, as it makes a cupcake that is so light and fluffy it is unbelievable!

Here we go, take a bowl and place 1.5 cups plain flour,1/3 cup unsweetened cocoa, 1 tsp baking soda,1/2 tsp salt, 1 cup sugar,1/2 cup vegetable oil,1 cup cold water in a bowl and mix well. Add 2 tbs vinegar, and again mix until the mixture is all one colour (the vinegar will start a chemical reaction with the baking soda, and you will see the mixture will have a trail of a slighter lighter colour in it). Pour the mixture into 12 cupcake cases, and cook for 20 minutes at 180c/350f.
Make sure they cool before you ice them!


Chocolate fudge icing finishes this cupcake off in a divine way! Melt together 3 tbs of butter (i used dairy free), and 100g chocolate chips. Then add icing sugar until it is thick but still a little sloppy. It will semi harden on the cake, but will be glossy and delicious as you can see from the photos above!

Friday, February 14, 2014

Cupcake cuties

My daughter got a cupcake machine for christmas, and i decided that since today was valentine's day, i would break it out and make some mini treats for my little ones. Of course i had to make two batters, as George is a chocoholic, and Miss Tina is the vanilla queen..so here goes: I used the same recipe for both, just added cocoa (3tsp) for the boy's. Basic recipe: 4 tsp each of flour, sugar and cocoa(if needed), add a pinch of salt, 1/4 tsp baking powder, 1/4 tsp baking soda and 1/2 cup of milk. It is really that easy! Now i made little teeny, tiny ones, and it made 14, but i would say it would probably make around 6 normal sized cupcakes. I used the cupcake maker and it took about 6 minutes for each batch, but i would say if you are cooking normal cupcakes, i would go
with 12-14 minutes at 180. From this basic recipe
 you can add choc chips, dried fruit, dollops of jam etc to change the flavour- it is really a wonderfully versatile recipe.
 I finished them off today with a simple icing,
just icing sugar and water (i added cocoa for
the boy's icing, and pink icing to the girls).
....aren't they sweet?

Sunday, February 2, 2014

Going coco for coconut!!

A friend challenged me to try my hand at coconut macaroons but i didn;t have any dessicated coconut to hand, so i dutifully went and bought some..at the same time another post popped up on my facebook for coconut and carrot bars, and i thought to myself..ooh, i have two carrots in the fridge, lets have a go at that :)
This led to a baking spree, and it was only after i had used my very last drop of golden syrup that i realised i hadn't made my coconut macaroons :(
So here you go- three ways to use up the dessicated coconut sitting at the back of your cupboard :)
First up the coconut and carrot bars! I used the recipe from cooking for busy mums (find it here )and they were lovely although i couldn't quite make up my mind wether they were supposed to be savory or sweet...they are rather moreish though!


Next up, chocolate zucchini muffins, i followed the recipe posted here by vegie smugglers here
  and finished them off with a chocolate icing-half a cup of
 semi sweet chocolate chips(dairy free of course), quarter of a cup coconut milk and a cup of icing sugar..check out these cuties...


And last but not least, little cups of sunshine...Hawaian coconut cupcakes! Again from vegie smugglers, follow the link here here these i finished off with a rather more grown up icing...I used the pineapple juice and icing sugar as suggested but i added 2 tablespoons of bacardi :D These are really delicious, even without the icing

So there you are, three delicious dairy free treats, all using that lovely dessicated coconut :) Enjoy!!!


Sunday, July 21, 2013

Icecream time!

Summers here in Cyprus are very long and VERY hot! Icecream tends to keep us going, and although i have my old faithful chocolate icecream recipe, i haven't had much success with a vanilla icecream recipe...until NOW! My wonderful father came to visit last month and with him he brought this recipe. It fell at my feet yesterday (quite literally as i was tidying up today) and i thought i'd give it a go :)

So here it is, the best vegan vanilla icecream recipe that i have tried so far (warning..you will never buy shop bought icecream again!!)

 In a blender, combine the soymilk powder (1.5 cups-i used the whole packet of SoVita soy drink vanilla powder), water (2/3 cup) and soymilk (3.5 cups i used Koko coconut milk) until well blended.

Combine the soymilk mixture with the sugar (1/2 cup), vanilla (1 tbsp) and apple cider vinegar (1 tsp)in a small saucepan over medium-low heat. Stirring constantly, cook until the mixture is thick and syrupy in consistency. Pour the mixture into a 9”x 5”metal loaf pan or other medium-sized metal or aluminum pan. Place the pan in the freezer uncovered for 1 hour.
Then you can either put into an icecram maker and let it do it's thing or if you don;t have such a machine, scrape the ice cream into a blender and blend on high for 30 seconds, or until mixture is creamy. Place the mixture back in the pan and back into the freezer. Repeat this procedure 3 more times at 30 minute intervals, allowing the ice cream to chill in the freezer covered for 1 hour after the last blend before serving.
Serve ice cream cold, adding your choice of toppings if desired.
The children naturally had theirs in a cone-with a cherry on top! 


We (hubby and myself) opted for a little more grownup way to eat, with some hot apple pie!

It is creamy, delicious, and you can eat it any way you want...Enjoy!

Monday, April 1, 2013

When life gives you lemons...


So here in Cyprus it is lemon season, and we have these big, fat, juicy lemons. So, i'm sitting here, looking at these lovely lemons, and a thought occurs to me that we can be a bit canny, and make some lovely treats, using EVERY part of this zesty fruit. So here goes :)
First up is lemon Glyko...or spoon sweet. This is a traditional sweet here in Cyprus (nothing diet about it as it is fruit preserved in a thick syrup)
First get your lemons together, give them a good wash, and then remove the zest (the yellow part) either by grating (which i personally can;t do without damaging my hands) or by using a sharp knife, just peel a very thin layer off the top of the lemon. (first super tip- you need to find fat lemons with thick skin- this will not work with thin skinned lemons!).
 Then score the lemon around (in segments) and peel off the white 'pith"..this is what you will be using to make your spoon sweet. You can choose to make thick segments or thin (we prefer thin) but if you make the thick ones, you can roll it into an attractive shape before you put it into the syrup. 
Put your lemon peel into a saucepan and weigh (you want to know how much lemon peel you have as you will need the number in order to work out how much sugar to use. It is basically 1:1 ration between fruit and sugar, and then add 1.5 cups water). Then fill up the pan with water and boil the peel for 5 minutes... and repeat twice more (this is to get rid of the bitterness). DO NOT throw away this water- we will be using it later for another recipe! When you have finished this part, drain the water, and now we get on to the final syrupy part :) So now, armed with the weight of the fruit, add an equal amount of sugar, and one and a half cups of water and boil until the syrup sets..this will be around 1 and a half hours. leave to cool and then put into a jar. They are ready to eat immediately :)

Onto recipe no 2...remember all that lemony water that we had left?Well, i'm going to let you into a little secret- how to make Mama Michaelides' Moonshine (or Posh Squash as it was nicknamed at a party i went to last night!). You need 1 gallon (or 4 litres) of this water- if you don't have enough lemony water, just top it up with normal water, add the sugar (2 kilos) and mix until it dissolves, then cool and put into your container (i use one of those 5 gallon barrels that we usually use for water). Once the water is cooled, add the juice of 6 lemons, raisins (225g), and the yeast (30g-i use 3x 11g packets). Seal the top by placing cling film over the top of the barrel (with some pin pricks in it-the yeast will emit gas, if you don't prick the clingfilm, it will pop!) and leave in a cool place for 2 weeks to do it's stuff. After that time, you can rack it into your bottles although it will need time to clear to the fine sunshiney yellow stuff :) Please note you will have to strain the liquid before you bottle it to get all the 'bits' out).


Friday, September 14, 2012

New Mission:Losing weight :)

Start of a new year give us Mummies a chance to re-evaluate, and make a new start of our own. I have decided to take my body into check, and shed some of the extra kilos. I started yesterday, adn i am happy to say that the recipes i have found can also fit into my son's dairy free lifestyle, so i can cook one meal for the whole family, adn i know it is healthy and good for everyone!

Last night i attempted my first slimming world meal, using a recipe i found in the slimming world magazine, for Jambalaya (I altered the ingredients slightly to fit in better with what i had in the fridge!)

First i sprayed my wok with Pam (cooking spray) and cooked 2 large onions (i cut them chunky as that is the way we like them) and 200g green beans (topped and tailed) for around 5 minutes. Then i added garlic (4 cloves chopped finely), ginger (4 cm piece peeled and grated) and cooked for another minute or so, until it started to soften. I stirred in cajun spice mix (1 tsp) and 200ml of chicken stock (this is a third of the quantity of chicken stock that you will be using in this dish) and cooked it for another 3 minutes.
I then added 1 can of chopped tomatos, 350g chicken (cut into strips) and another 200ml of chicken stock, brought it to the boil and added 250g rice, then i covered the wok and simmered for 10 minutes.
Lastly I stirred in 1 can kidney beans, brought it back to the boil, added the remaining stock and simmered for 7 minutes, before adding 200g of zucchini (julienned), and leaving to simmer for a final 3 minutes..(by this time the rice should be cooked and the liquid should have been absorbed. Serves 4 people

It should look somthing like this!

Sunday, August 26, 2012

Chocolate fingers

Now, one of my ABSOLUTE favourite things to eat in this world, is chocolate fingers. It is also one of those things that my lil one has never tried (I don;t know about anywhere else in the world, but here in Cyprus, you can't find non dairy chocolate fingers), so i put my thinking cap on, and here we go! :) first the biscuit- take 260g plain flour and 2 tsp of baking powder, mix, then rub in 120g butter. It should end up looking like this:


Now add 100g sugar , 1 egg, and approx 2 tbsp of water, so that it comes together in a nice soft dough.
Tear small pieces off, and winkle them between your fingers to make small sausages. Place on greaseproof paper on a cookie sheet, and into the preheated oven at 175C for 15 minutes (or until the ends of the fingers start to brown.)

Take out of the oven and allow to cool. Then melt your chocolate (i put mine into the microwave for about 30 seconds) and dip each of the fingers into the chocolate. 
Lay them out again on the greaseproof paper, and place into the fridge to harden the chocolate up.


If you are living in a more temperate clime, you might be able to keep these in a biscuit tin, but here we have to keep them in the fridge!


And the best bit of the whole process? The children eating the leftover melted chocolate :D


Tuesday, July 24, 2012

one dough four bisciuts!

I took a basic sugar cookie recipe: (250g dairy free butter, 1 cup sugar, 1 egg, 1/2 tsp vanilla extract, 3 cups flour, 1 1/2 tsp baking powder and 1/2 tsp salt) kneaded the dough into a smooth ball, adn put it into the fridge to chill. After around an hour, i took the dough out, and divided it into 4 smaller batches. I put 3 of these smaller balls back into the fridge, and added 1/3 cup of cocoa to the first dough. When the cocoa was evenly distributed into the dough, i put it into the fridge to rest again, and took out another ball. To this (the 2nd ball) i added 40g of well chopped pistachio nuts. Again i kneaded the dough so that the nuts were well distibuted, then back into the fridge. The next ball, i added the juice of half a lemon, and 2 drops of yellow food colour, as with the other two, i kneaded the extra ingredient in well, and replaced it in the fridge. The last ball, i left alone. An hour later i took the doughs out, one at a time, and rolled it out.

 I had some small cookie cutters in different shapes, and i thought it would be fun to make each differnet flavour, into a different shape. Into the oven the cookies went for 15 mins, and then i cooled on a cooling rack. When the cookies were cooled, the fun REALLY began :) The cocoa cookies i sandwiched together with a chocolate icing (1 tbsp cocoa, 100g icing sugar and  50g dairy free butter) to make mini bourbon cream biscuits...the lemon cookies, i iced with a lemon glaze (100g icing sugar, juice of 1/2 lemon and 3 drops of yellow food icing) the plain sugar cookies i drizzled with a simple icing (100g sugar, 3 teaspoons water) and the pistachio cookies i just rolled them in icing sugar.

 All the cookies were a hit with the children, which is, of course, the most important thing, but i also think that the small size of the cookies would make them perfect for serving at a tea, with bone china teacups :D

Sunday, May 6, 2012

Summer is on it's way...

...how do I know? You may well ask! When my children are running around in their underpants, when the sky is blue with not a cloud in sight...when the mosquitos are attacking in their droves..THAT, my friend, is when i know that summer is on it's way. And so it begins, the endless calls for icecream! I dug out the old icecream machine yesterday, and remembered to stick it in the freezer last night, so today we were ready to go.
After a short debate on which flavour to go for, on this, the first spin of the year, we settled on chocolate. Always a crowd pleaser in this house of chocolate lovers...i have made it my mission to find the very best recipe for dairy free chocolate icecream. And i have to confess...THIS IS IT! I have taken tips and pointers from a few different sources, and it has been a bit hit an miss trying to find the perfect dairy free milk with which to create my icecream but I can now reveal my findings...i used coconut milk (not the canned stuff with the heavy cream) this coconut milk comes in a carton (much like a milk carton) and is thicker and fattier than soya milk.
 I used 2 cups, and added 4 tablespoons of vegetable oil to up the fat content a little more- this mixture i put into a pan with 2 oz chocolate (dairy free of course), and 1/3 cup of cocoa, heat until the chocolate is melted and then stir so that it all comes together in a glossy chocolate milk. Take off the heat, and while the mixture is cooling, in a clean bowl, seperate 4 egg yolks and add 1 cup of sugar. Beat the eggs and sugar mixture, and then add the chocolate milk 1 tablespoon at a time, (you must let the mix rest in between each spoonful so that you so not end up with scrambled eggs).

When you have added all the chocolate milk to the eggs, and it is all mixed together, return the mixture to the pan and boil for 2 minutes. Now you need to cool your mixture for at least 1 hour before you put it into your icecream maker. My icecream maker takes about 25 minutes to turn the mixture into softserve icecream, but i prefer mine to be firmer, so i then turn the icecream into a container and back into the freezer it goes for an hour or so.

Now, you might have noticed that you are left with 4 egg whites....what luscious thing can we do with those??? Ah, I know-MERINGUES! Place 4 egg whites into a bowl (not plastic) and whip until it makes peaks when you lift the beaters out of the bowl. Then add 115g sugar, a tablespoon at a time, until you have incorporated all the sugar,and the egg whites are glossy and stiff.


Line a cookie sheet with baking paper, and spoon the egg whites onto the paper in whatever shape you like. Into the oven at 100C for 1 and 1/4 hours et voila.... Icecream with meringues...dessert fit for a king!


Monday, February 27, 2012

Green Monday Blues

So, today is Green Monday (the first day of Lent) here in Cyprus. Traditionally we (cypriots) take to the fields this day, and eat shellfish prepared on the bbq, and vegetables. Today though, it is raining (so all the fields will be swampy) and we have decided to make food at home. The children are a little upset that their picnic (and kite flying) has been called off, so i came up with the idea of making rainbow cupcakes :) My daughter forund a video tutorial and told me that we just HAD to make them :)

Take your favourite cupcake recipe (or mix) and make it up. We used the basic cupcake recipes from Isa Chandra Moscowitz's "vegan cupcakes rule the world" (1 cup soy milk, 1 teaspoon apple cider vine, 3/4 cup sugar, 1/3 cup vegetable oil, 1/2 teaspoon almond extract, 2 teaspoon vanilla extract, 1 cup plain flour, 3./4 teaspoon baking soda, 1/2 teaspoon baking powder, 1/4 teaspoon salt). I (when i say I, i mean my lovely assistant ) put the dry ingredients into the bowl


and added the wet ingredients, and mix it up, into a nice batter.


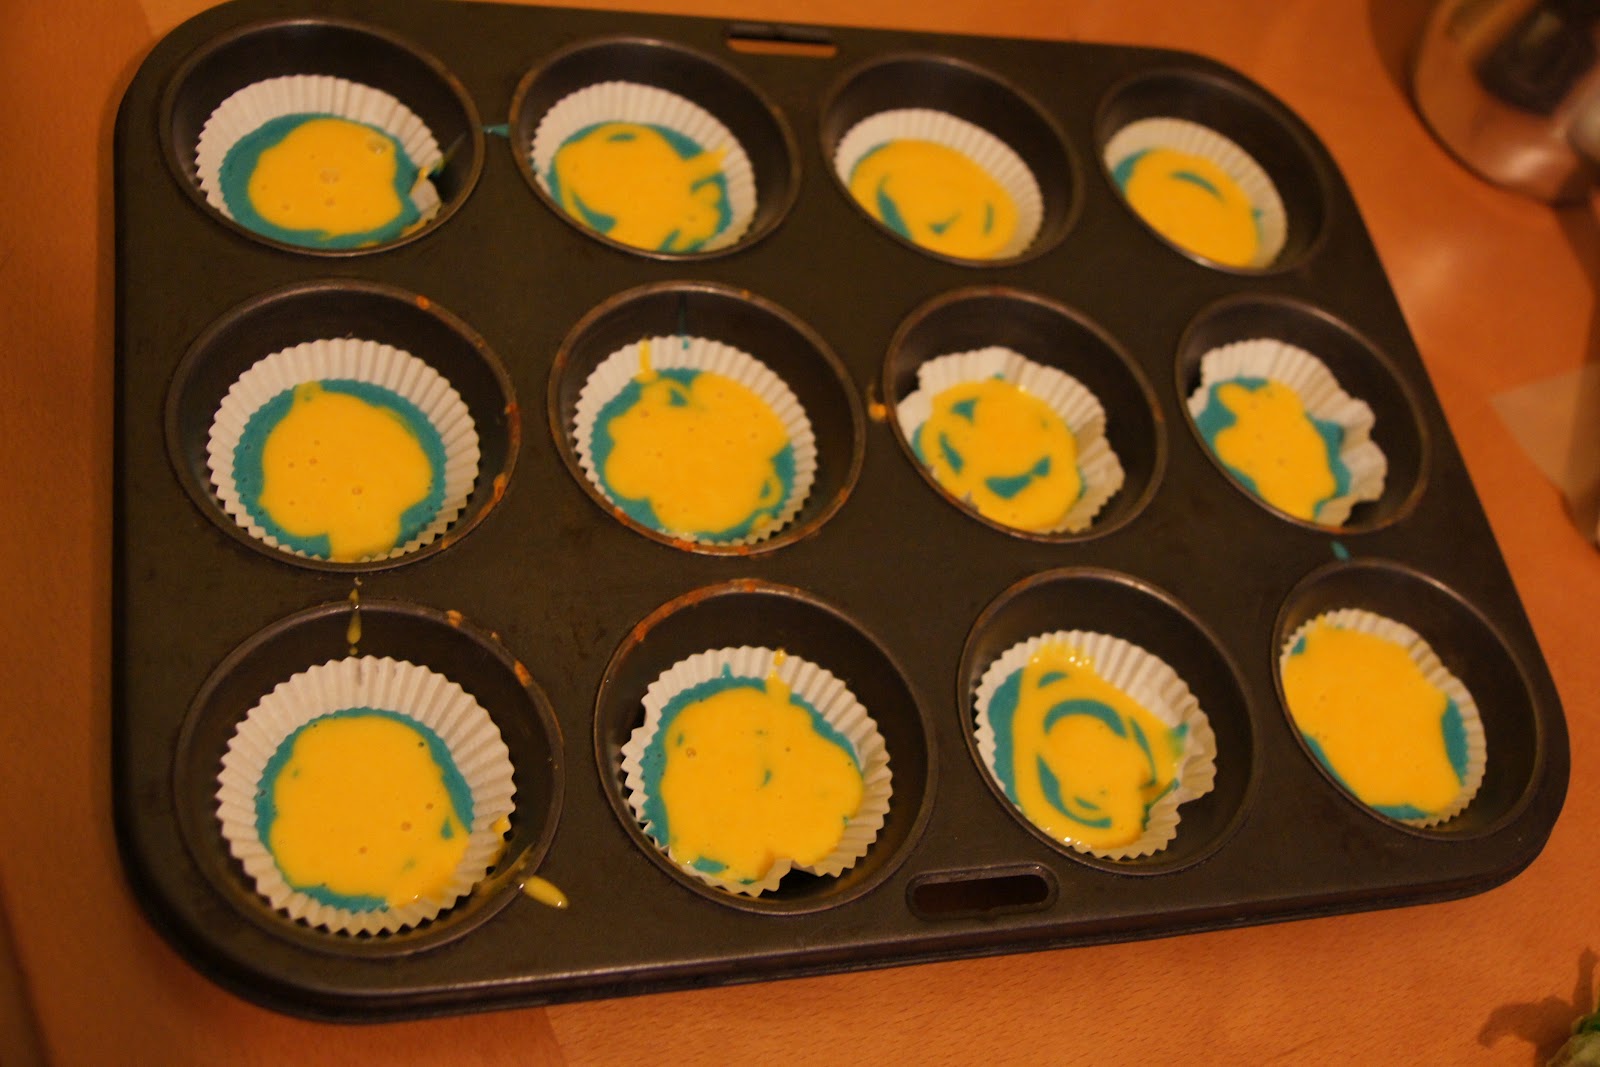
Then, i seperated the mixture into 4(thats the number of food colouring bottles i had) seperate ziplock bags and added enough food colouring to colour the whole bag of mix.

Next I snipped off one corner of each bag, and layered the different coloured mixes into the lined cupcake trays.Be creative - i did a few different ones, but the bullseye one was my daughters favourite :)


Then into the oven at 180C for 18 minutes or so (quicker if you use a fan oven) Check them, by inserting a toothpick- if it comes out clean-they are done!


I frosted them with a quick and easy frosting-1/2 cup of dairy free butter, 1/2 cup of vegetable lard, 3.5 cups icing sugar. It should be thick, so you can put it in a piping bag. Put swirls of frosting on each cupcake, and then sprinkle with hundreds and thousands..


Yummy! It's heaven in a bite, and just the pick me up we needed today!


Wednesday, January 11, 2012

Rough and Ready Village Olive Bread


Take 4 cups of plain flour in your bowl, add 2 teaspoons baking powder, 1 cup olive oil, 2 cups lukewarm water. 

Mix them by hand, until you have a very soft and fluid dough. Now add 2 cups olives (I prefer to leave the pips in, as they do here in the village, but you can always pip and slice the olives (or buy ready sliced olives), about 3 teaspoons of dried mint (rub it through you fingers into the mix) and 1 large (or two small) onions, finely diced. 

Knead the dough until all the ingredients are distributed through the dough, and put into a pan. 

Place the pan into a medium oven (180C) for one hour, or until it is a nice golden brown colour. Serve with coffee for a nice snack, or with some nice hearty soup to make a very filling meal!


ENJOY!

Sunday, November 13, 2011

Tina's Apple pie thingies

So this recipe was invented today by my daughter Tina. I provided the ingredients and the initial idea and my Daughter corrected me, improved the idea, and come up with apple pie thingies! The original recipe (that came from my dad, featured slices of banana, wrapped in a package of pastry, fried and then covered in icing sugar...well Tina said that the banana filling sounded "yucky" adn that we should use up our apples instead....


So, I used my favourite pastry recipe (see "back to basics" post for more info). I rolled it out until it was quite thin, and then Tina cut out rounds, using a wide mouthed plastic cup. We then put around 200g of apple cubed into a frying pan, with a teaspoon of sugar, the juice form one tangerine, quarter of a teaspoon of ground cinnamon, and 1 teaspoon of butter. We put the frying pan over a medium heat until the butter had melted, adn the apple had turned a golden colour.


Then we took the frying pan off the heat, and put a teaspoon of the apple mixture into each round of pastry. Tina then folded one side of the round to the other, and sealed it, finishing it off cleanly with a cup (empanada style). Tina experimented with some other shapes, including a ball, and I have to say they were all just a delicious! :) These 'parcels' were dropped into hot oil and deep fried until golden brown, and then rolled in icing sugar.Tada!!


Tuesday, November 1, 2011

Culturally cooking-Under Pressure

I am a member of a Women's Group here in Cyprus, by the name of Cyprus Women of Today. Today it was my pleasure to host one of our Culturally Cooking events. What we do, i a member invites us to her home, and teaches us to cook something. A discussion had arisen over how to use a pressure cooker, and what kind of things you can cook, so i decided to cook a few different dishes, to show how quick and easy and versatile the pressure cooker is. A menu was born-black eyed beans, followed by spare ribs,and  finished off with a steamed chocolate pudding with chocolate fudge sauce...


So, we started with the black eyed beans. I took 2 cups of beans, and placed in the pressure cooker with 1 tablespoon of salt, and 5 cups water.
I sealed the pressure cooker, brought it up to pressure, and cooked for around 9 minutes. I used the quick release, so that i could check on the beans, and saw they needed another 5 minutes. Total cooking time 14 minutes. To serve, ladle into a bowl, not forgetting to add some juice, then drizzle with olive oil and lemon juice. This is traditionally served with boiled vegetables (either zucchini or perhaps some swiss chard). We also like to eat a tuna salad as a side dish- 1 can tuna, 1 bunch of parsley chopped,and 2 spring onions chopped.

Now for the  "Oh My" spare ribs (so called because that is the comment they got from one of my best friends, when she first tried them!)


I took about 4 kilos of spare ribs, cut into 2-3 rib pieces thanks to my lovely butcher, and rubbed them down with the seasoning (1tsp salt, 1 tsp pepper, 1 tsp chili powder, and 1 tsp paprika). Then i heated about 2 tablespoons oil in the pressure cooker, and browned off the ribs


I added 4 onions that i had sliced into half moons, and the 1.5 cups of ketchup, as well as 0.5 cup of vinegar.

Then i closed the pressure cooker, and brought it up to pressure (then turned it to low to cook), and cooked the ribs for 15 minutes.

When you open the pressure cooker (after letting the pressure dissipate on it's own, or hitting the quick release button) you will smell the most wonderful smell :)


Last but not least, I made a chocolate steamed pudding...I took a 1/4 packet of chocolate chips, and 1 tablespoon of dairy free butter and melted them together in the microwave. Then i added the dry ingredients, 1.5 teaspoon baking powder, 0.5 teaspoon salt,0.5 cup sugar,and 1 cup of flour, to the chocolate/butter mix, and added the liquid ingredients-0.5 cup milk and 1 teaspoon vanilla. Mix until the batter is smooth, then turn into a cake tin (small enough to fit into the pressure cooker). Place a rack inside the pressure cooker, and then place the cake tin on top. Close the pressure cooker, and bring up to pressure. Cook for 30 minutes, and then check the pudding (you check the pudding the same way you would a cake- stick in a knife and if it comes out clean, it is ready)

So here it is, a full meal cooked int he pressure cooker :) :) :)