Sunday, May 6, 2012

Summer is on it's way...

...how do I know? You may well ask! When my children are running around in their underpants, when the sky is blue with not a cloud in sight...when the mosquitos are attacking in their droves..THAT, my friend, is when i know that summer is on it's way. And so it begins, the endless calls for icecream! I dug out the old icecream machine yesterday, and remembered to stick it in the freezer last night, so today we were ready to go.
After a short debate on which flavour to go for, on this, the first spin of the year, we settled on chocolate. Always a crowd pleaser in this house of chocolate lovers...i have made it my mission to find the very best recipe for dairy free chocolate icecream. And i have to confess...THIS IS IT! I have taken tips and pointers from a few different sources, and it has been a bit hit an miss trying to find the perfect dairy free milk with which to create my icecream but I can now reveal my findings...i used coconut milk (not the canned stuff with the heavy cream) this coconut milk comes in a carton (much like a milk carton) and is thicker and fattier than soya milk.
 I used 2 cups, and added 4 tablespoons of vegetable oil to up the fat content a little more- this mixture i put into a pan with 2 oz chocolate (dairy free of course), and 1/3 cup of cocoa, heat until the chocolate is melted and then stir so that it all comes together in a glossy chocolate milk. Take off the heat, and while the mixture is cooling, in a clean bowl, seperate 4 egg yolks and add 1 cup of sugar. Beat the eggs and sugar mixture, and then add the chocolate milk 1 tablespoon at a time, (you must let the mix rest in between each spoonful so that you so not end up with scrambled eggs).

When you have added all the chocolate milk to the eggs, and it is all mixed together, return the mixture to the pan and boil for 2 minutes. Now you need to cool your mixture for at least 1 hour before you put it into your icecream maker. My icecream maker takes about 25 minutes to turn the mixture into softserve icecream, but i prefer mine to be firmer, so i then turn the icecream into a container and back into the freezer it goes for an hour or so.

Now, you might have noticed that you are left with 4 egg whites....what luscious thing can we do with those??? Ah, I know-MERINGUES! Place 4 egg whites into a bowl (not plastic) and whip until it makes peaks when you lift the beaters out of the bowl. Then add 115g sugar, a tablespoon at a time, until you have incorporated all the sugar,and the egg whites are glossy and stiff.


Line a cookie sheet with baking paper, and spoon the egg whites onto the paper in whatever shape you like. Into the oven at 100C for 1 and 1/4 hours et voila.... Icecream with meringues...dessert fit for a king!


Monday, February 27, 2012

Green Monday Blues

So, today is Green Monday (the first day of Lent) here in Cyprus. Traditionally we (cypriots) take to the fields this day, and eat shellfish prepared on the bbq, and vegetables. Today though, it is raining (so all the fields will be swampy) and we have decided to make food at home. The children are a little upset that their picnic (and kite flying) has been called off, so i came up with the idea of making rainbow cupcakes :) My daughter forund a video tutorial and told me that we just HAD to make them :)

Take your favourite cupcake recipe (or mix) and make it up. We used the basic cupcake recipes from Isa Chandra Moscowitz's "vegan cupcakes rule the world" (1 cup soy milk, 1 teaspoon apple cider vine, 3/4 cup sugar, 1/3 cup vegetable oil, 1/2 teaspoon almond extract, 2 teaspoon vanilla extract, 1 cup plain flour, 3./4 teaspoon baking soda, 1/2 teaspoon baking powder, 1/4 teaspoon salt). I (when i say I, i mean my lovely assistant ) put the dry ingredients into the bowl


and added the wet ingredients, and mix it up, into a nice batter.


Then, i seperated the mixture into 4(thats the number of food colouring bottles i had) seperate ziplock bags and added enough food colouring to colour the whole bag of mix.

Next I snipped off one corner of each bag, and layered the different coloured mixes into the lined cupcake trays.Be creative - i did a few different ones, but the bullseye one was my daughters favourite :)


Then into the oven at 180C for 18 minutes or so (quicker if you use a fan oven) Check them, by inserting a toothpick- if it comes out clean-they are done!


I frosted them with a quick and easy frosting-1/2 cup of dairy free butter, 1/2 cup of vegetable lard, 3.5 cups icing sugar. It should be thick, so you can put it in a piping bag. Put swirls of frosting on each cupcake, and then sprinkle with hundreds and thousands..


Yummy! It's heaven in a bite, and just the pick me up we needed today!


Wednesday, January 11, 2012

Rough and Ready Village Olive Bread


Take 4 cups of plain flour in your bowl, add 2 teaspoons baking powder, 1 cup olive oil, 2 cups lukewarm water. 

Mix them by hand, until you have a very soft and fluid dough. Now add 2 cups olives (I prefer to leave the pips in, as they do here in the village, but you can always pip and slice the olives (or buy ready sliced olives), about 3 teaspoons of dried mint (rub it through you fingers into the mix) and 1 large (or two small) onions, finely diced. 

Knead the dough until all the ingredients are distributed through the dough, and put into a pan. 

Place the pan into a medium oven (180C) for one hour, or until it is a nice golden brown colour. Serve with coffee for a nice snack, or with some nice hearty soup to make a very filling meal!


ENJOY!

Sunday, November 13, 2011

Tina's Apple pie thingies

So this recipe was invented today by my daughter Tina. I provided the ingredients and the initial idea and my Daughter corrected me, improved the idea, and come up with apple pie thingies! The original recipe (that came from my dad, featured slices of banana, wrapped in a package of pastry, fried and then covered in icing sugar...well Tina said that the banana filling sounded "yucky" adn that we should use up our apples instead....


So, I used my favourite pastry recipe (see "back to basics" post for more info). I rolled it out until it was quite thin, and then Tina cut out rounds, using a wide mouthed plastic cup. We then put around 200g of apple cubed into a frying pan, with a teaspoon of sugar, the juice form one tangerine, quarter of a teaspoon of ground cinnamon, and 1 teaspoon of butter. We put the frying pan over a medium heat until the butter had melted, adn the apple had turned a golden colour.


Then we took the frying pan off the heat, and put a teaspoon of the apple mixture into each round of pastry. Tina then folded one side of the round to the other, and sealed it, finishing it off cleanly with a cup (empanada style). Tina experimented with some other shapes, including a ball, and I have to say they were all just a delicious! :) These 'parcels' were dropped into hot oil and deep fried until golden brown, and then rolled in icing sugar.Tada!!


Tuesday, November 1, 2011

Culturally cooking-Under Pressure

I am a member of a Women's Group here in Cyprus, by the name of Cyprus Women of Today. Today it was my pleasure to host one of our Culturally Cooking events. What we do, i a member invites us to her home, and teaches us to cook something. A discussion had arisen over how to use a pressure cooker, and what kind of things you can cook, so i decided to cook a few different dishes, to show how quick and easy and versatile the pressure cooker is. A menu was born-black eyed beans, followed by spare ribs,and  finished off with a steamed chocolate pudding with chocolate fudge sauce...


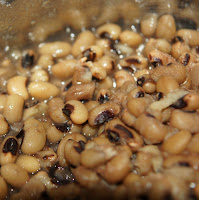
So, we started with the black eyed beans. I took 2 cups of beans, and placed in the pressure cooker with 1 tablespoon of salt, and 5 cups water.
I sealed the pressure cooker, brought it up to pressure, and cooked for around 9 minutes. I used the quick release, so that i could check on the beans, and saw they needed another 5 minutes. Total cooking time 14 minutes. To serve, ladle into a bowl, not forgetting to add some juice, then drizzle with olive oil and lemon juice. This is traditionally served with boiled vegetables (either zucchini or perhaps some swiss chard). We also like to eat a tuna salad as a side dish- 1 can tuna, 1 bunch of parsley chopped,and 2 spring onions chopped.

Now for the  "Oh My" spare ribs (so called because that is the comment they got from one of my best friends, when she first tried them!)


I took about 4 kilos of spare ribs, cut into 2-3 rib pieces thanks to my lovely butcher, and rubbed them down with the seasoning (1tsp salt, 1 tsp pepper, 1 tsp chili powder, and 1 tsp paprika). Then i heated about 2 tablespoons oil in the pressure cooker, and browned off the ribs


I added 4 onions that i had sliced into half moons, and the 1.5 cups of ketchup, as well as 0.5 cup of vinegar.

Then i closed the pressure cooker, and brought it up to pressure (then turned it to low to cook), and cooked the ribs for 15 minutes.

When you open the pressure cooker (after letting the pressure dissipate on it's own, or hitting the quick release button) you will smell the most wonderful smell :)


Last but not least, I made a chocolate steamed pudding...I took a 1/4 packet of chocolate chips, and 1 tablespoon of dairy free butter and melted them together in the microwave. Then i added the dry ingredients, 1.5 teaspoon baking powder, 0.5 teaspoon salt,0.5 cup sugar,and 1 cup of flour, to the chocolate/butter mix, and added the liquid ingredients-0.5 cup milk and 1 teaspoon vanilla. Mix until the batter is smooth, then turn into a cake tin (small enough to fit into the pressure cooker). Place a rack inside the pressure cooker, and then place the cake tin on top. Close the pressure cooker, and bring up to pressure. Cook for 30 minutes, and then check the pudding (you check the pudding the same way you would a cake- stick in a knife and if it comes out clean, it is ready)

So here it is, a full meal cooked int he pressure cooker :) :) :)


Tuesday, October 18, 2011

It's raining here in Cyprus, and the temperature has dropped a couple of degrees, so it has got me to thinking about comfort food. Today's delight is chocolate sponge with hot chocolate sauce on top...


The chocolate sponge recipe is one i use all the time, 1.5 cups plain flour, 1 cup water or soya milk, 0.5 cup oil, 0.5 cup sugar, 0.5 cup cocoa, 1 egg, 1.5 teaspoon baking powder. Mix the ingredients well, and pour into a cake tin of your choice- today i used a loaf tin.Bake for 30 minutes at 180 (or until a knife comes out clean).


Now for the special stuff- the sauce-take 0,5 cup of chocolate pieces, and warm together with 2 tablespoons of dairy free butter until melted.


 Now add 0.5 cups sugar, and 1 cup soya cream. Warm until the mixture is thick and glossy (today i added 1 tablespoon of custard powder as i wanted the sauce EVEN thicker!


Enjoy!

Saturday, September 10, 2011

Zucchini bread

I'm still trying to use up all of my courgettes (zucchini) so i thought i would make a zucchini bread, so i got online to find a recipe. I wanted to make a savoury bread, but all i could find were very sweet cake type recipes, so i thought i would adapt one, and this is what i came up with:


I took 3 cups plain flour,1 tsp salt, 1/2 tsp black pepper, 1 tsp baking soda,1 tsp baking powder,3 large eggs,1/2 cup sugar,1 cup vegetable oil, 2 cups shredded zucchini (with the skins),3 onions, chopped (about 1/2 cup), and a cup of shredded carrot then mixed the mixture, until it was homogenous. Then i turned it out into two10 1/2 inch loaf pans, and sprinkled the top of the loaves with crushed cashew nuts, and crushed pistachio nuts to give it some crunch, I also sprinkled some chili flakes onto the top to give it some zip
Then it was into the oven at 185C for about 55-60 minutes, or until a knife comes out clean. Cool for 10 minutes or so, then turn out onto a wire rack to cool completely. This is another of those baked goods that tastes yummy when it is cooled down, but if you can cut it when it is still warm, and then spread with your favorite 'butter'-its divine!!